ESIS

1. About eSIS

The Electronic Students Information System (eSIS) is a system designed to provide school users with easy and instant access to:


  • Managing school profiles (e.g., basic information, schedule, grades, homerooms, etc.)
  • Admitting new students
  • Transferring students
  • Withdrawing students
  • Managing next year's reservations
  • Handling parent requests


The system has been tailored to serve the needs of charter and private schools, as well as nurseries.


This guide aims to ensure a seamless onboarding journey. In it, you will find all the information you need to learn more about the system, how to use it, and its available features.


Before you start using the system, please make sure to use one of the following browsers:


  • Edge (version 14 or newer)
  • Firefox (version 52 or newer)
  • Google Chrome (version 49 or newer)
  • Apple Safari (version 10 or newer)


2. Creating and Managing the School Profile

2.1. Creating a School Profile

Only ADEK users with special permissions are authorized to add a new school profile. Here are the steps to follow:


  1. Sign in to eSIS.
  2. From the left-side menu, select "Schools".
  3. Expand the menu under "Schools" and click on "School Details".
  4. On the top-right corner, click on "Add New School".
  5. Fill out the application wizard to add a new school. This includes providing general information, school configuration, school schedules (grades taught, homerooms), and attachments (optional).
  6. Click on "Create School" to finalize the process.

2.2. Managing a School Profile

2.2.1. Editing School Information

2.2.1.1. General Information

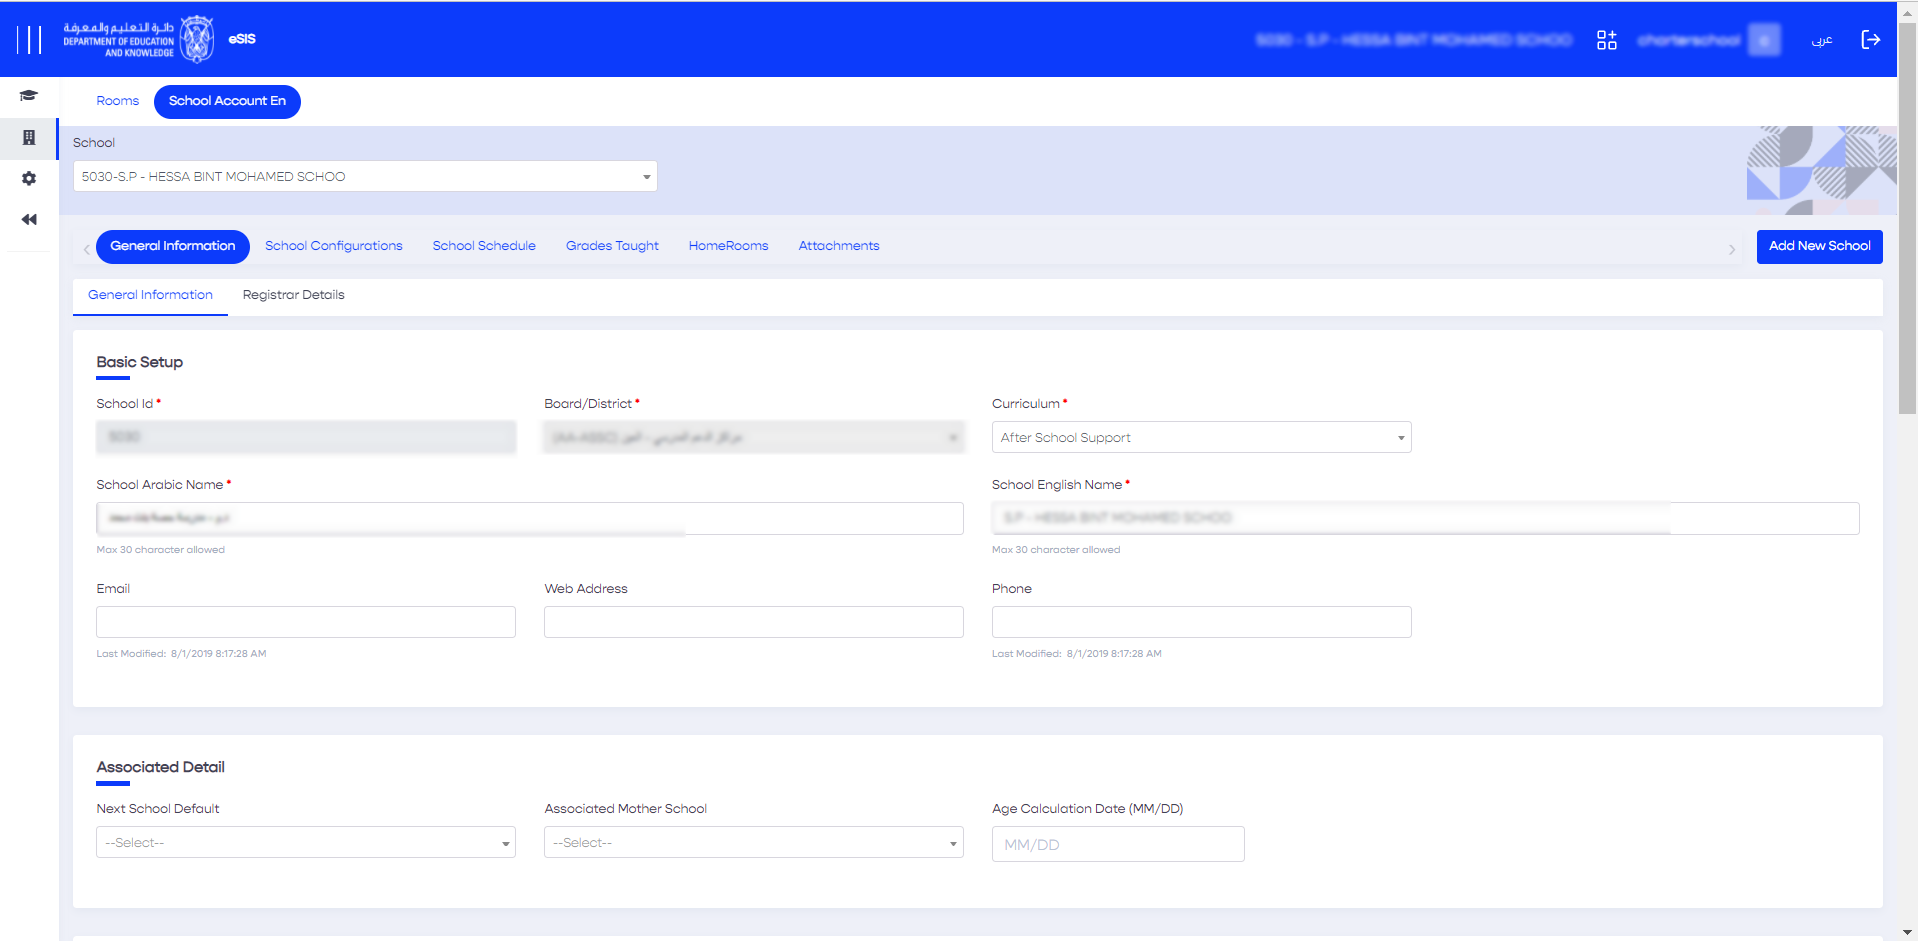
This tab provides access to school details such as school name, contact details, address, and other attributes related to registrars and curricula:


  1. Sign in to eSIS.
  2. From the left-side menu, select "Schools".
  3. Expand the menu under "Schools" and click on "School Details".
  4. Choose the target school from the list of schools.
  5. Navigate to the "School General Information" tab.
  6. Make the necessary changes.
  7. Click on "Save" to save the changes.
2.2.1.1.1. History Log

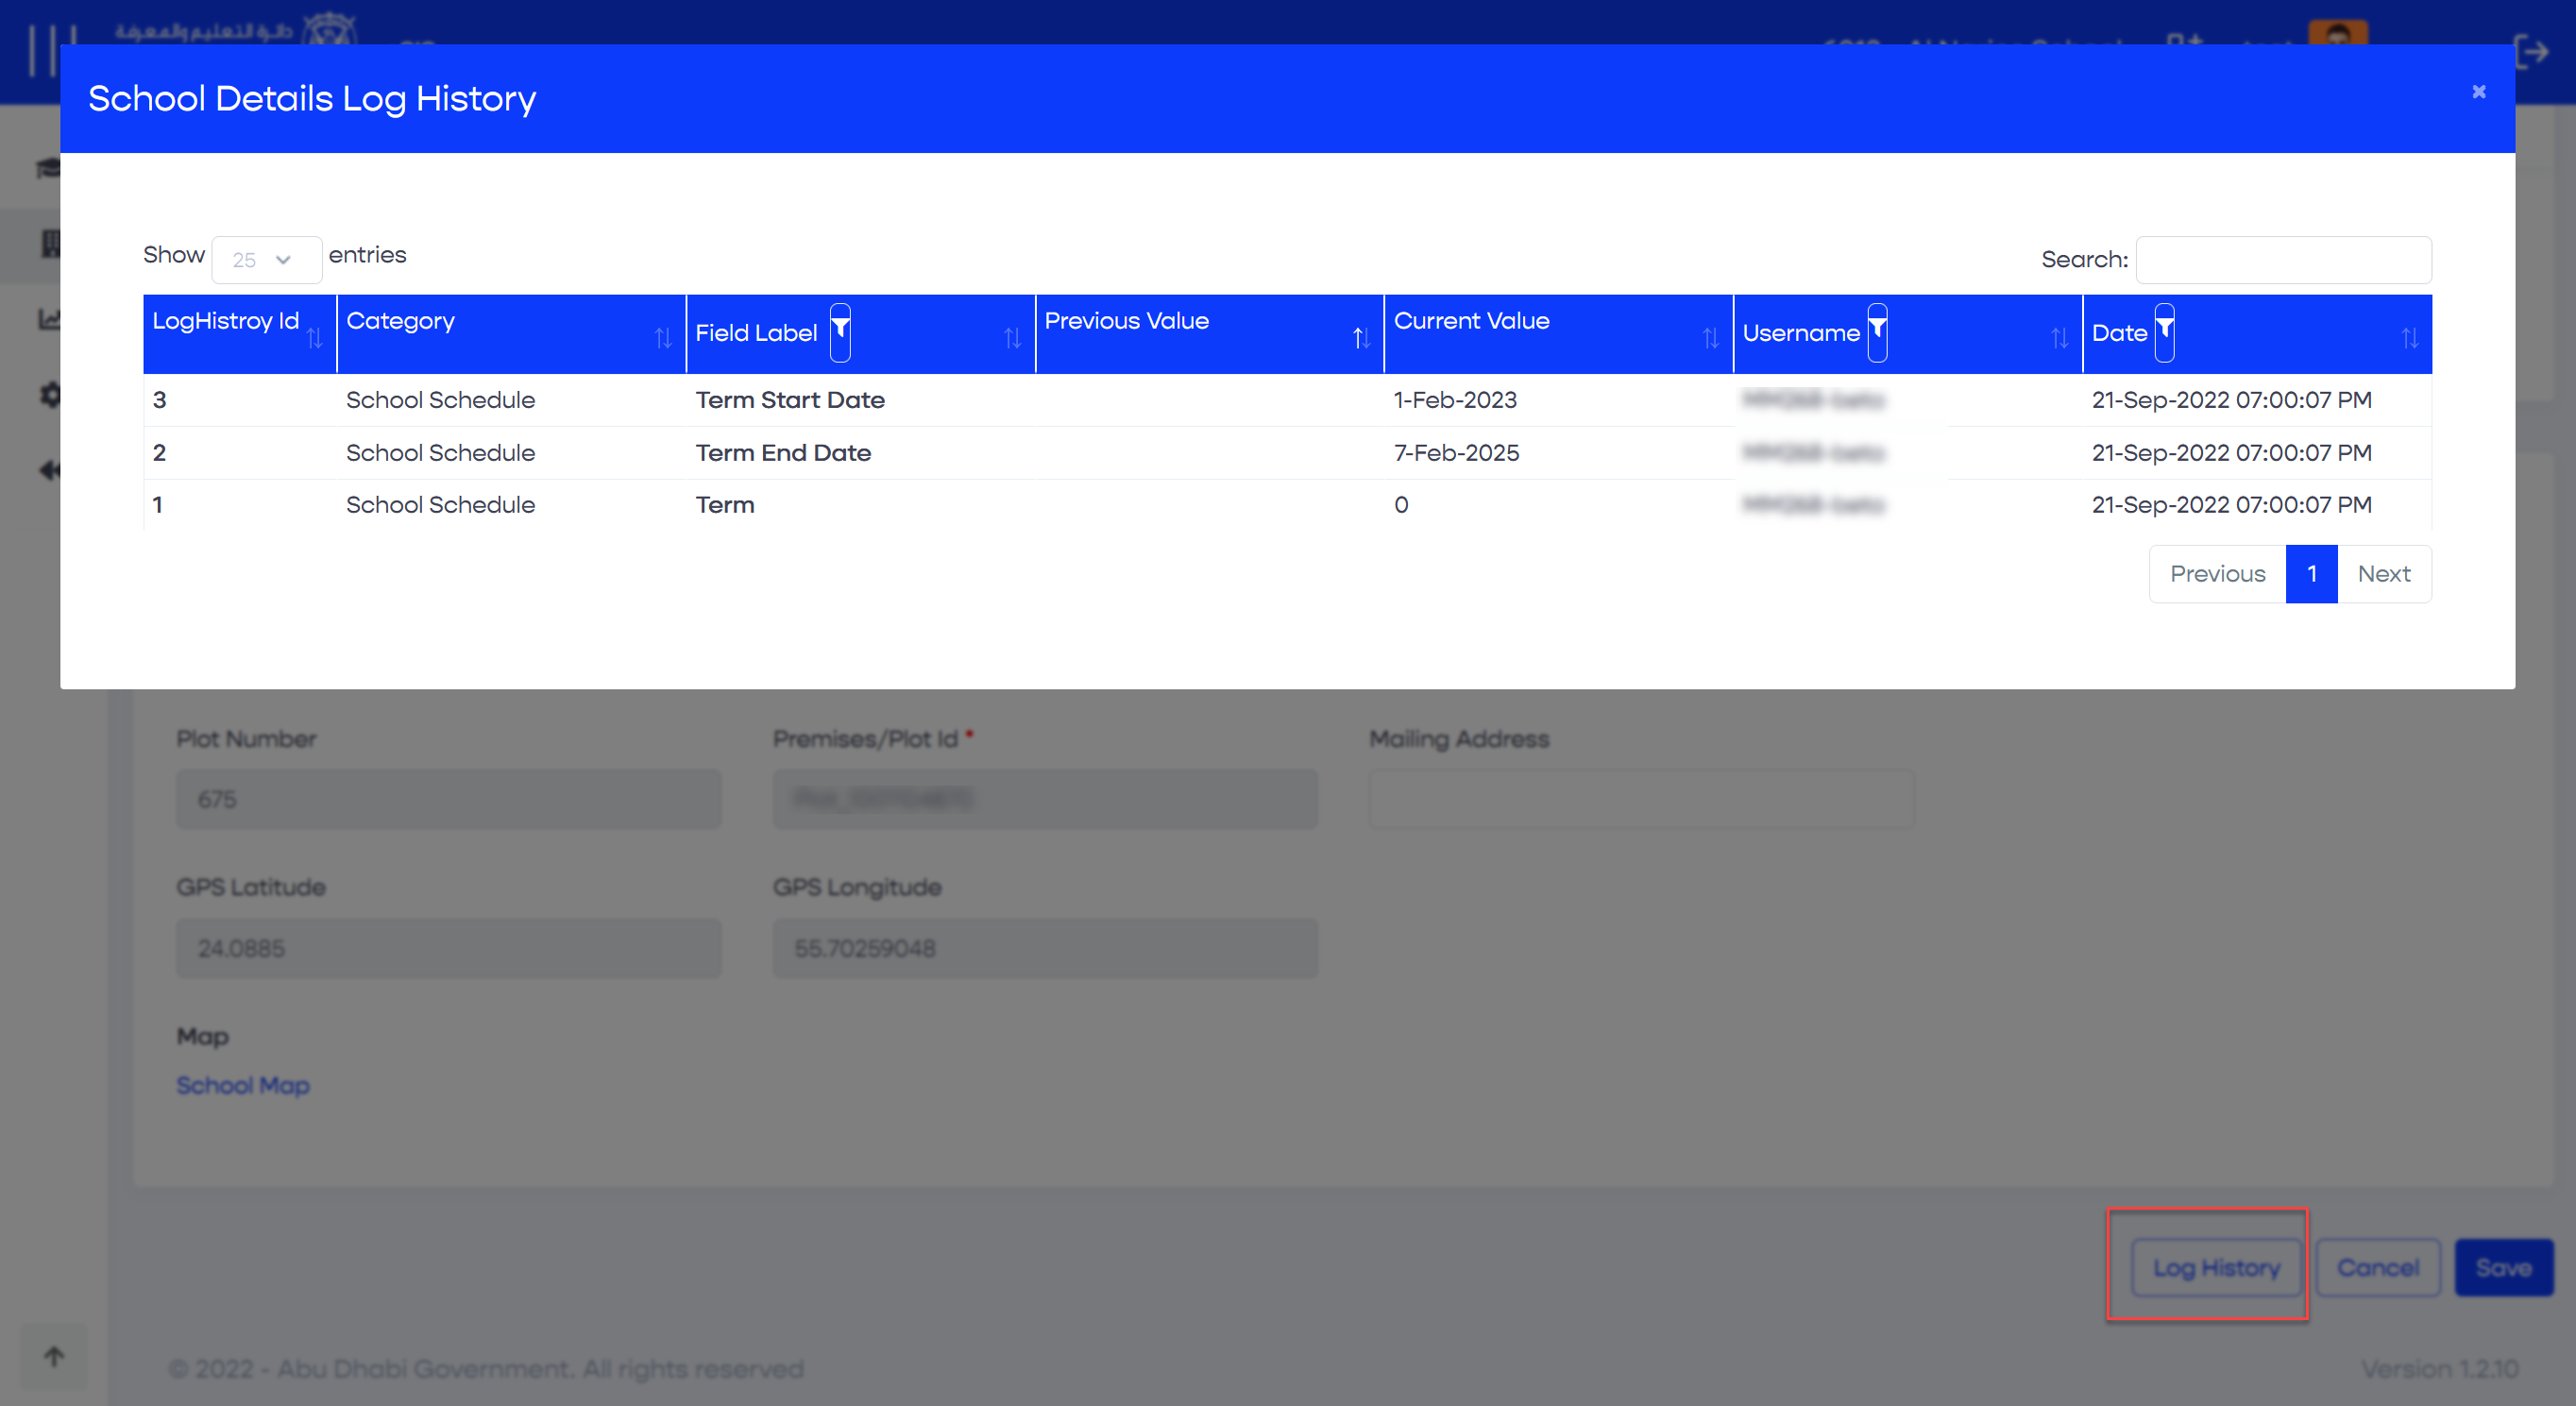
Within this popup, you will have the ability to view all transactions performed related to the school's basic information. It displays the following details:


  1. Action date
  2. Action username
  3. Updated field (previous and new value)

2.2.1.2. School Configurations

2.2.1.2.1. Defining the Academic Year
  1. Sign in to eSIS.
  2. From the left-side menu, select "Schools".
  3. Expand the menu under "Schools" and click on "School Details".
  4. Choose the target school from the list of schools.
  5. Navigate to the "School Configurations" tab.
  6. Go to the "Registration" section.
  7. Click on the current academic year to define the existing year or click "Next" to define the next academic year.
  8. Click on "Save" to save the changes.
2.2.1.2.2. Defining Capacity
  1. Sign in to eSIS.
  2. From the left-side menu, select "Schools".
  3. Expand the menu under "Schools" and click on "School Details".
  4. Choose the target school from the list of schools.
  5. Navigate to the "School Configurations" tab.
  6. Go to the "Capacity" section.
  7. Make the required changes.
  8. Click the "Save" button.


Admin users can update the licensed capacity and the maximum number of homerooms when checking the "Current Academic Year". School users can view this information as read-only.

Info


Students admitted to the Autism Resource Base (ARB) will be excluded from the school capacity counter.