ESIS

2.3. Rooms

2.3.1. Adding Rooms

  1. Sign in to eSIS.
  2. From the left-side menu, select "Schools".
  3. Expand the menu under "Schools" and select "School Details".
  4. On the top, click on "Rooms".
  5. From the top-right corner, click on "Add".
  6. Fill in the room details.
  7. Click on "Save" and the new room will be listed.

Warning


Maximum number of students in each homeroom:


30 for grades 1 to 12

25 for KG grades


Info 


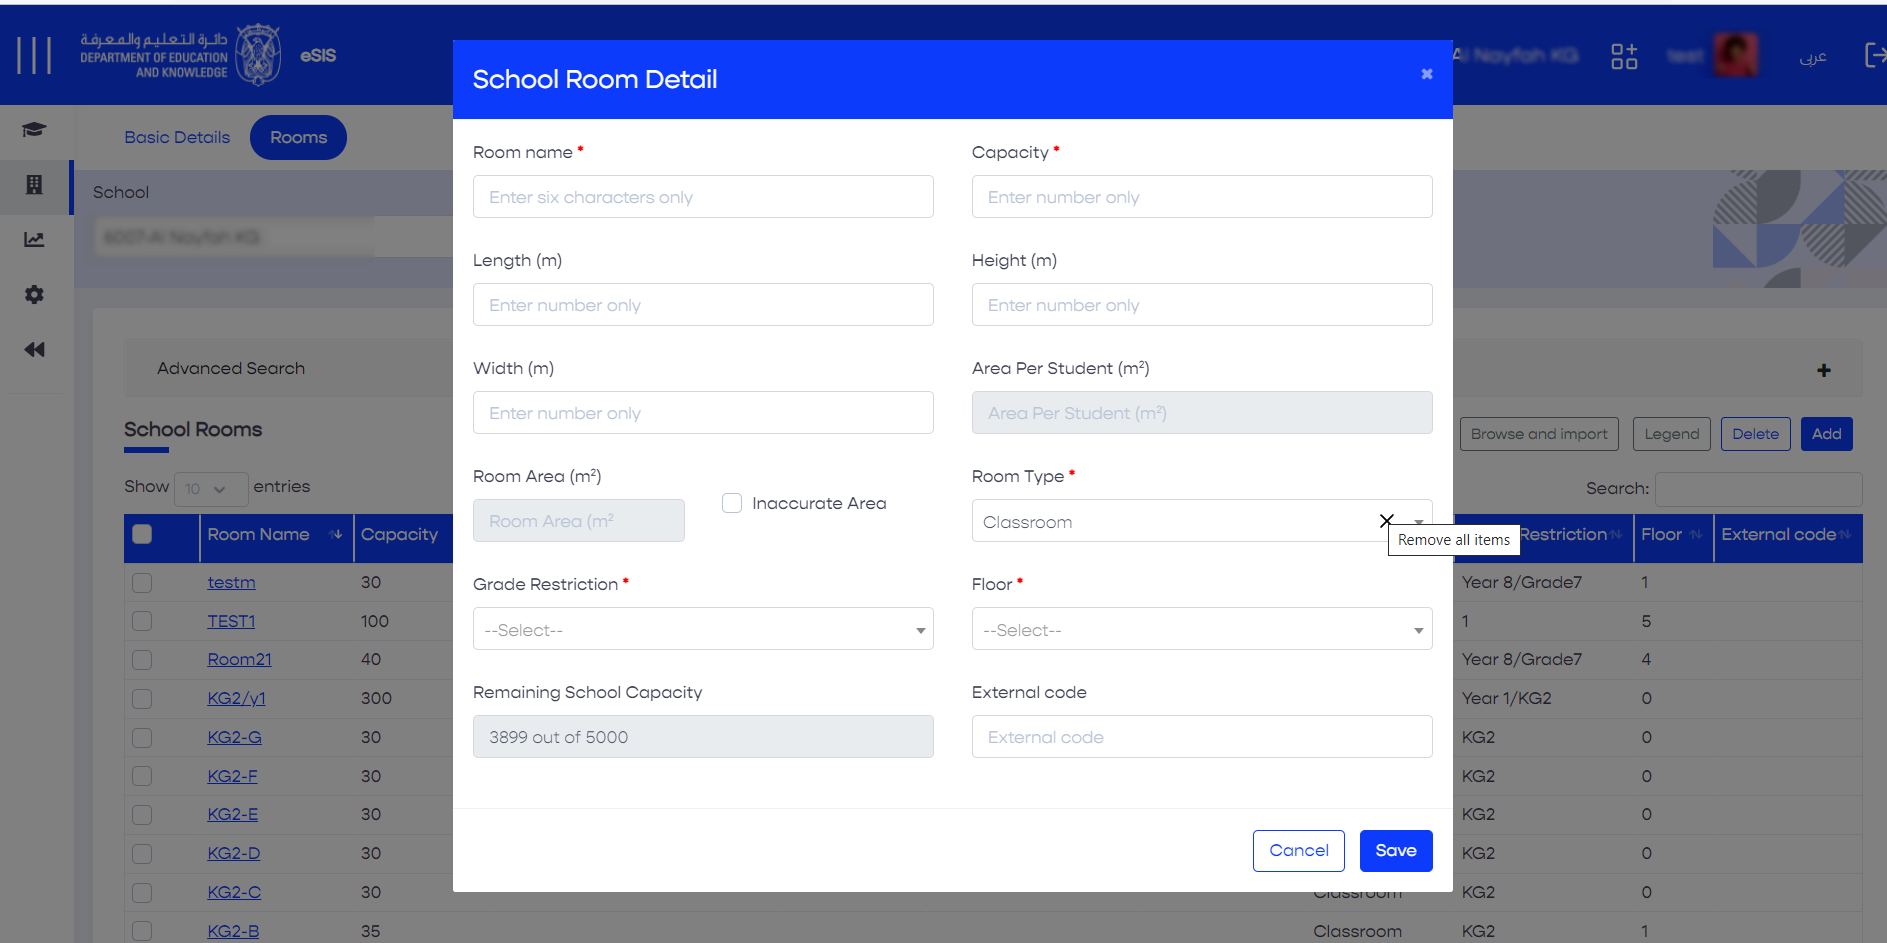
When you create a new room and set its dimensions, those dimensions determine how many people can comfortably fit inside according to a particular equation. Consequently, when choosing a homeroom for this space, it should accommodate a number of people within the capacity determined by its dimensions.

2.3.1.1. Adding Rooms by Using an Excel Sheet

  1. Sign in to eSIS.
  2. From the left-side menu, select "Schools".
  3. Expand the menu under "Schools" and select "School Details".
  4. On the top, click on "Rooms".
  5. Expand the icon on the top-right.
  6. Choose "Extract".
  7. A sample file that needs to be uploaded will be downloaded.
  8. Fill in the sample file with the required information.
  9. Expand the icon on the top-right.
  10. Choose "Upload Homeroom Information".

2.3.2. Editing Rooms

  1. Sign in to eSIS.
  2. From the left-side menu, select "Schools".
  3. Expand the menu under "Schools" and select "School Details".
  4. On the top, click on "Rooms".
  5. Select the desired room.
  6. Edit the room details.
  7. Click on "Save".

2.3.3. Deleting Rooms

  1. Sign in to eSIS.
  2. From the left-side menu, choose "Schools."
  3. Expand the menu under "Schools" and select "School Details".
  4. Click on "Rooms" at the top of the page.
  5. Select the desired room.
  6. From the top-right corner, click "Delete"; the room will be removed from the list.